Step-by-Step Guide: How To Apply For E-Passport In Pakistan
-
Syeda Qandeel Zehra
-
- Published August 17, 2023
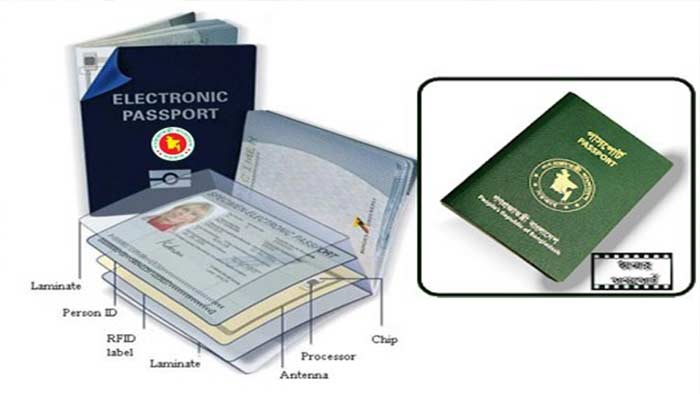
As countries embrace technological advancements in travel and security, Pakistan has introduced its e-Passport program, aligning with international standards. These modern passports feature an embedded electronic chip storing biometric information, bolstering security and efficiency. This guide offers a concise step-by-step process for obtaining a Pakistan e-Passport, enabling applicants to easily navigate the application procedure and access the benefits of this advanced travel document.

1: Gather Required Documents
Before you begin the application process, make sure you have the following documents and information ready:
- National Identity Card (CNIC) or Smart Card
- Existing valid passport (if applicable)
- Passport-size photographs (as per the specifications provided by the authorities)
- Other personal details such as your contact information, address, etc.
2: Online Application
- Visit the official website of the Directorate General of Immigration and Passports (DGIP) of Pakistan. You can find the e-Passport application portal on their website.
- Create an account if you don’t have one already. If you already have an account, log in using your credentials.
- Fill out the online application form with accurate and up-to-date information. Make sure all the details match the information on your CNIC.
- Upload scanned copies of your CNIC, passport-size photographs, and any other required documents.
3: Fee Payment
- After completing the online application form, you’ll be prompted to pay the e-Passport fee. The fee amount may vary depending on the type of passport you’re applying for (regular, urgent, executive, etc.).
- Choose your preferred payment method, which may include credit/debit card, online banking, or other available options.
4: Schedule an Appointment
- Once your payment is confirmed, you’ll receive a confirmation email or notification along with a reference number.
- Use the reference number to schedule an appointment at the nearest e-Passport office or center. You’ll need to select a date and time that works for you.
5: Biometric Verification and Data Collection
- On the day of your appointment, visit the designated e-Passport center at the scheduled time.
- Provide your reference number to the staff at the center and follow their instructions.
- Your biometric information (fingerprints, photograph, and possibly iris scan) will be collected at the center for security verification.
6: Application Processing
- Your application, along with the collected biometric data, will be processed by the relevant authorities.
- The e-Passport will be manufactured, and your personal data will be securely stored on the embedded electronic chip.
7: Passport Collection
- Once the processing is complete, you will receive a notification via email or SMS indicating that your e-Passport is ready for collection.
- Visit the e-Passport center on the specified date to collect your new e-Passport. You may need to provide your original CNIC for verification purposes.
Syeda Qandeel Zehra
Syeda Qandeel Zehra, an MBA holder with four years of content writing experience, is a versatile writer adept in news, blogs, and articles. Specializing in SEO content, she combines business insight with engaging storytelling. Keen on staying updated with industry trends, Syeda crafts compelling and high-ranking content that resonates with her audience.


Leave a Reply